Introduction
➤ The blog is divided into two parts. In the first part, we will learn everything there is to know about strapi, including its advantages, installation, and properties.
➤ Strapi is a headless content management platform that gives a flexible approach to rapidly creating APIs. Together with the effective React framework Next.js, it generates an easy development environment.
➤ Next.js headless CMS with Strapi, developers can make use of server-side rendering features for dynamic web applications and manage content easily. This combination offers an effective solution for customizing content management with Strapi and Next.js, enabling the quick development of scalable and adaptable projects.
Understanding Strapi
➤ When building dynamic and scalable online apps, developers may gain significantly from knowing how to integrate Strapi with Next.js. Because Strapi is a headless CMS, it offers an adaptable content management system that separates the content from the presentation layer, giving developers for applications more adaptability and speed. With the help of Next.js, the powerful React framework, developers may take advantage of both platforms as Next.js framework for CMS to produce applications that are effective and optimized.
➤ There are various advantages to headless CMS integration with Next.js. Firstly, content managers workflow is simplified by Strapi’s user-friendly admin interface, which makes it simple for developers to produce and manage various content categories. Developers may then utilize Next.js to dynamically generate this content on the client-side, allowing for quick and responsive user experiences, by retrieving it via Strapi’s APIs. Furthermore, content management privacy and reliability are provided by Strapi’s role-based access control and content version features, which are essential for enterprise-level applications.
➤ Several elements are designed of Strapi CMS features for Next.js development. These enable developers to create dynamic and engaging content experiences. They include support for media management, sophisticated text editing capabilities, and customized content types. Additionally, Strapi’s REST and GraphQL APIs offer flexibility in data fetching, allowing developers to select the best strategy for their particular use cases.
➤ For deeper understanding and best practices in Next.js, developers can refer to Next.js best practices in 2024. This resource provides insights into optimizing performance, implementing server-side rendering, and handling data fetching in Next.js applications, complementing the capabilities of Strapi for seamless integration and efficient Next.js CMS development.
Benefits of using a headless CMS with Next.js
➤ There are many advantages of headless CMS integration with Next.js, which increases the benefits of both platforms. First of all, Content management with Strapi for Next.js work together to optimize content management procedures, enabling quick updates and flawless content delivery. With this integration, developers are freed from the limitations of conventional CMS structures to concentrate on creating amazing user experiences.
➤ Furthermore, Next.js is excellently complemented by the scalability of headless CMS solutions like Strapi. Strapi’s scalable infrastructure makes sure that content distribution stays efficient and seamless even when a website experience increases in traffic or an increase in the volume of resources. Because of its scalability, Next.js apps can manage any degree of user involvement or content complexity with ease, resulting in improved performance and dependability.
➤ Developers can develop dynamic pages using Next.js using data that is retrieved from Strapi. Dynamic routes can be used to create pages for any piece of material that is kept in Strapi.
➤ For example, you can use Next.js to create a dynamic route to render separate blog entries based on their distinct slugs if your blog is stored in Strapi.
Setting strapi in your system
Pre requirements
- Before installing Strapi, the following requirements must be installed on your machine:
- Nodejs: Only Active LTS or Maintenance LTS versions are supported
- Your preferred Node.js package manager
- npm
- yarn
- A supported database is also required
| Database | Minimum | Recommended |
| MySQL | 5.7.8 | 8.0 |
| MariaDB | 10.3 | 10.6 |
| PostgreSQL | 11.0 | 14.0 |
| SQLite | 3 | 3 |
Installation process and configuration
Installation process
Step 1: Execute the below command
➤ npx create-strapi-app@latest my-project
- ‘npx’ runs a command from an npm package
- ‘create-strapi-app’ is the Strapi package
- ‘@latest’ indicates that the latest version of Strapi is used
- ‘my-project’ is the name of your Strapi project
Step 2: Select the type of installation

Step 2.1 QuickStart (recommended)
➤ This will be using the SQLite default database from strapi.
➤ Developers are able to modify it from the configuration to suit their needs
Step 2.2 Custom (manual settings)
This allows Developers to select the database of their choice from SQLite , MySQL , PostgreSQL , MariaDB.
Step 3: Add the CLI option for understanding (optional steps)
i) –quickstart
➤ Utilize pre-made strapi setups to create a project.
ii) –template
➤ Create a project with pre made strapi templates.
➤ Click to see in detail <a href=”https://docs.strapi.io/dev-docs/templates“> templates <a>
iii) –typescript
➤ Quick Start selects JavaScript as the default language.It will ask you to select in Custom Settings. You can use TypeScript or JavaScript, but if you add this to the npx command, Project will be created in typescript.
Step 4: After setup, open the project in a terminal and type the command “npm run develop” to launch the strapi server.
Step 5: Go to the Strapi Admin Console
➤ Using your browser, open the Strapi admin panel and visit to http://localhost:1337/admin. You may manage your data, provide API endpoints, and create content kinds here.
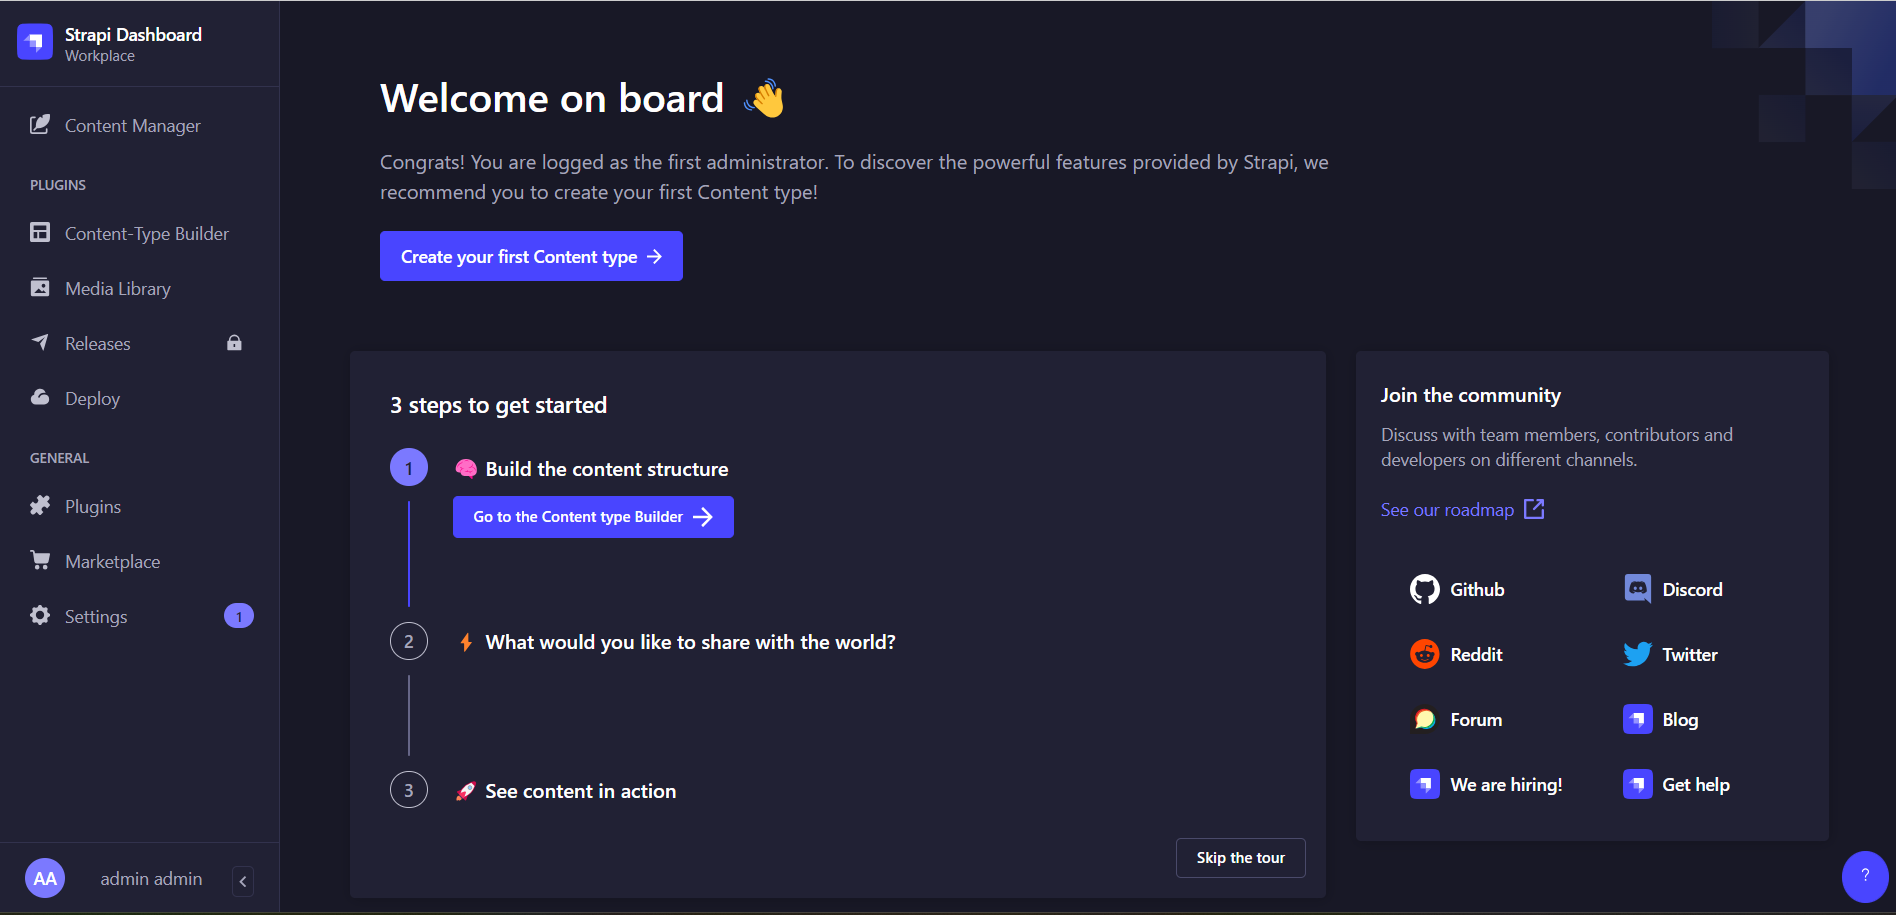
➤ Your browser now displays the dashboard below.
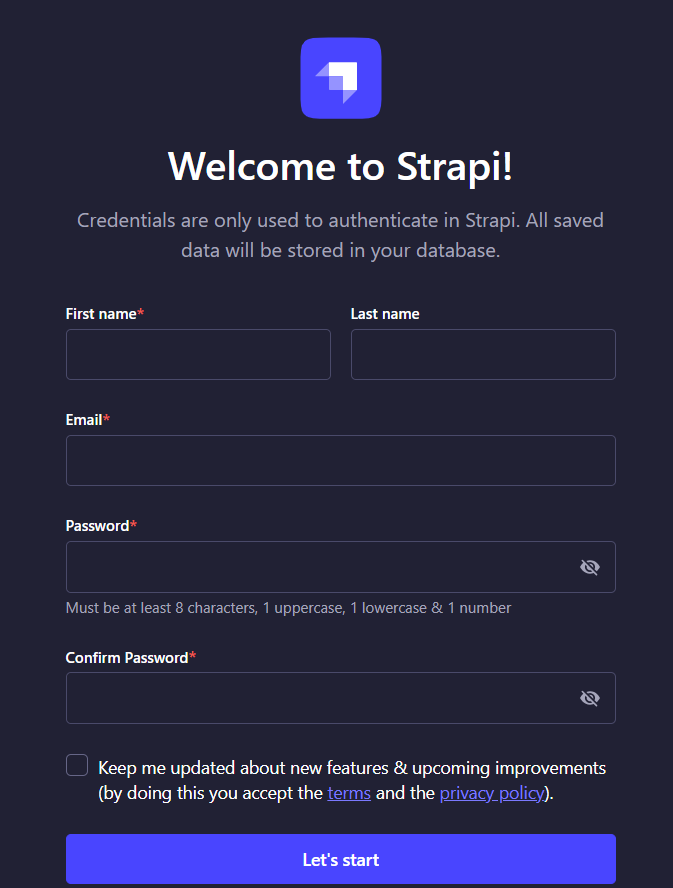
Step 6: Complete the information and log in to view the screen below
The strapi setup is complete.
Configuration
There are a few steps involved in setting up Strapi to connect to a database, but they are not that complicated. Using a PostgreSQL database as an example, I’ll walk you through setup Strapi below, but the procedure is the same for other databases.
Step 1: Configure Database Connection
➤ Launch the project in Visual Studio Code or your preferred editor.
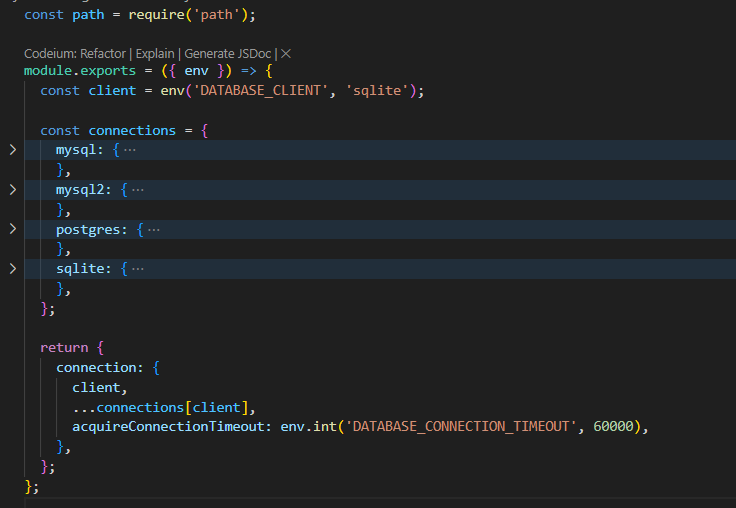
➤ Within that, you will find the config folder located in the root of the project inside that there is file called database.js.
➤ Launch that file.
➤ You may view the code content of the attachment below.
Step 2: Eliminate others and preserve your desire database
Step 3: Configure the Environment
➤ Using environment variables for sensitive data, such as database credentials, is a recommended practice. This is supported out of the box by Strapi. Ensure that the environment variables are configured according to the configuration of your database. They can be changed in .env file located in the root directory of your project.
➤ define the environment variables below according on your setup.
- DATABASE_HOST=localhost
- DATABASE_PORT=543
- DATABASE_NAME=myproject
- DATABASE_USERNAME=user
- DATABASE_PASSWORD=password
- DATABASE_SSL=false
Step 4: Run Strapi with npm run develop
Step 5: Go to the Strapi admin console
Using your browser, open the Strapi admin panel and visit to http://localhost:1337/admin. You may manage your data, provide API endpoints, and create content kinds here.
Leveraging Strapi CMS features for Next.js development
➤ With the help of the open-source strapi as a headless CMS (content management system), developers can create robust APIs fast and effectively. Making use of Strapi’s features can greatly improve the process of developing dynamic websites, online apps, and even mobile applications.
➤ Here is a detailed overview of some key features of Strapi and how they can be leveraged:
1. Custom content types
➤ Developers can define personalized content types using Strapi based on the particular requirements of their project. Different fields, including text, numbers, dates, photos, relations, and more, can be included in these content kinds. Developers can accurately construct their data structures to meet the needs of their applications by utilizing specific content types.
➤ The images for the various content types in Strapi are shown below-

➤ The above images feature typical content types, which are very common and include text, Boolean, rich text, JSON, number, email, date, and password.
➤ The content types below are interesting.
➤ Look at the picture first.
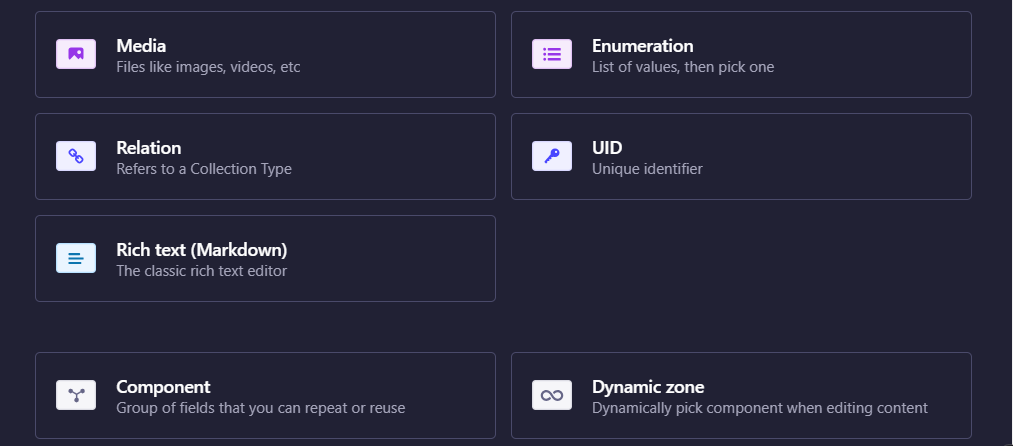
➤ It includes the content kinds listed below
Media
➤ Developers can directly upload files and images by setting up third-party file upload platforms such as AWS S3 and Cloudinary.
Relation
➤ The relation field creates relationships between multiple content types.
➤ Relationships between entities are one-to-one, one-to-many, or many-to-many and developers may use it according to need.
UID
➤ Entries are automatically assigned unique identifiers via the use of the UID field type.
➤ It’s frequently used for any unique identification needed for the application itself, such as the slug field.
➤ Prefix, suffix, and whether or not the field is mandatory are among the settings that developers might set.
Component
➤ Developers may create reusable field sets that can be integrated into other forms of content by using the component field.
➤ It is frequently utilized for linked fields that must be reused across several content kinds, such as address, contact information, or any other combination of related fields.
➤ Enhancing reusability and maintainability, developers may define the fields within the component and reuse it in other sorts of content.
Dynamic zones
➤ Due to it enables for the building of nested content structures, the dynamic zone field enables flexible and dynamic content modelling.
➤ It is frequently utilized in situations where the content’s structure is adaptive and differs from entry to entry, like in content blocks or page builders.
➤ Developers can specify various elements or content kinds that can be dynamically added, moved, or withdrawn within a dynamic zone, giving you flexibility in the development and administration of content.
2. Access control based on roles (RBAC)
Strapi provides developers with powerful role-based access control mechanisms that let them define different user roles and permissions. By using RBAC, developers may control who has access to what parts of the system and what activities they can perform. This capability is critical to the security and integrity of the application’s data.
3. Authentication and authorization
Built-in authentication and authorization features provided by Strapi include support for OAuth providers and JWT (JSON Web Tokens). Developers can quickly and easily design user authentication and authorization procedures, including password resets, user registration, logins, and limiting access to specific resources based on roles and permissions, by utilizing these features.
4. Plugins and extensions
Due to its customizable the environment, Strapi’s functionality can be expanded by developers using plugins and extensions. Without having to start from scratch, developers can extend the functionality and integrations of their apps by utilizing plugins. Plugins simplify the process of customizing and expanding Strapi to meet the needs of a project, be it extending the CMS’s capabilities or providing support for a certain database.
5. Webhooks
Developers can use Strapi to set up custom events or notifications in other systems when something occurs within the CMS because it supports webhooks. Webhooks offer an effective way for developers to link Strapi to other services and automate operations like updating external databases, sending email notifications, and activating CI/CD pipelines.
6. Globalization (i18n)
Integrated internationalization support is provided by Strapi for projects targeting global audiences. By utilizing this capability, developers may quickly handle content in many languages within a single instance of the program, which streamlines the localization process and offers consumers a consistent experience across various localities.
7. Environment- based configuration
Developers may define context-specific configurations with Strapi, including environment variables, database settings, and API keys. By using this functionality, developers may ensure consistency and security across deployments by managing various configurations for the development, staging, and production environments.
Conclusion
Here in this blog we see the basic understanding of strapi with it is benefits and features and also integration of strapi in simple steps now we will see integration of strapi with Nextjs in part 2.